
Notifications with Microsoft Power Automate and Teams
This article provides a quick explanation of how you can easily add feedback into your automation processes. It is extremely simple and effective and can be modified to suit whatever your requirements might be.
Step 1 - Create a Microsoft Power Automate Flow
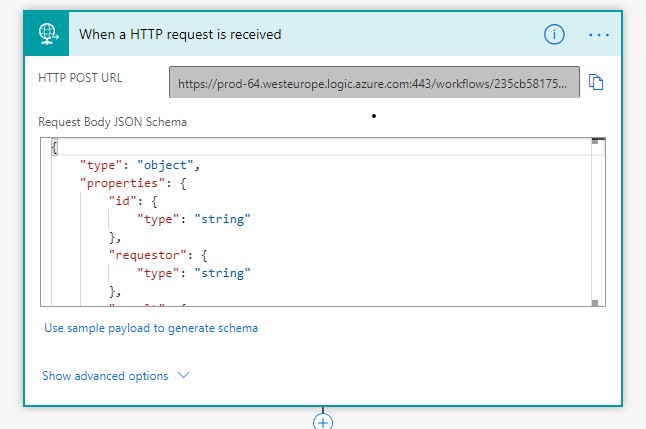
Microsoft Power Automate is an excellent tool for creating simple integrations between different systems. In this case we will use it to communicate the outcome of an automation process to Microsoft Teams. Start by going to https://flow.microsoft.com/ and create a new flow. Choose ‘When a HTTP request is received’ as your input, this will create a webhook (unique URL) which you can post data to.
Define your data schema
The webhook expects to receive a JSON document, you need to define the schema of the document in order for Power Automate to interpret the data and expose it as variables later in the process. If you don’t have a schema available, or don’t want to write one, you can simply paste in a example JSON document and it will create the schema for you. This works well for simple JSON documents.
At this point you need to think about the data you wish to communicate to the end user, here’s an example:
| Example JSON Document | Example JSON Schema |
|---|---|
{
    "id": "2425",
    "requestor": "user@company.com",
    "result": "Succeeded",
    "url": "https://automation.mycompany.com/job/2425",
    "data": {
        "device_name": "router-xyz",
        "interface": "GigabitEthernet1/0/33",
        "vlan_name": "printers",
        "vlan_number": 36
    }
}
|
{
    "type": "object",
    "properties": {
        "id": {
            "type": "string"
        },
        "requestor": {
            "type": "string"
        },
        "result": {
            "type": "string"
        },
        "url": {
            "type": "string"
        },
        "data": {
            "type": "object",
            "properties": {
                "device_name": {
                    "type": "string"
                },
                "interface": {
                    "type": "string"
                },
                "vlan_name": {
                    "type": "string"
                },
                "vlan_number": {
                    "type": "integer"
                }
            }
        }
    }
}
|
At this point you should have the first step in your process complete:
Step 2 - Create an Adaptive Card (optional)
Why not make things look pretty, and use an Adaptive Card. Adaptive Cards are “platform-agnostic snippets of UI, authored in JSON, that apps and services can openly exchange”. Cards can be informational, or even interactive with form elements and buttons. Learn more about Adaptive Cards at https://adaptivecards.io/. To get some inspiration go to https://adaptivecards.io/samples/.
Let’s begin designing our card using the web application at https://adaptivecards.io/designer/. Add whatever elements you wish and insert some example data. Later we’ll replace this with the variables that are provided by Flow from the JSON document your automation process sends to the webhook.
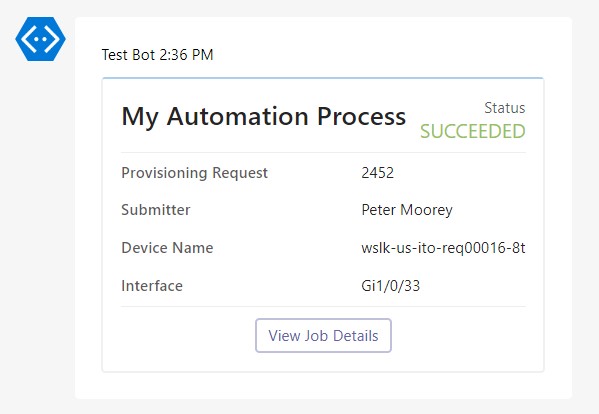
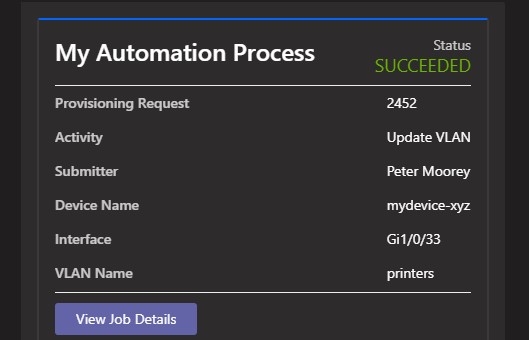
Here’s what I came up with:
Step 3 - Send the Notification
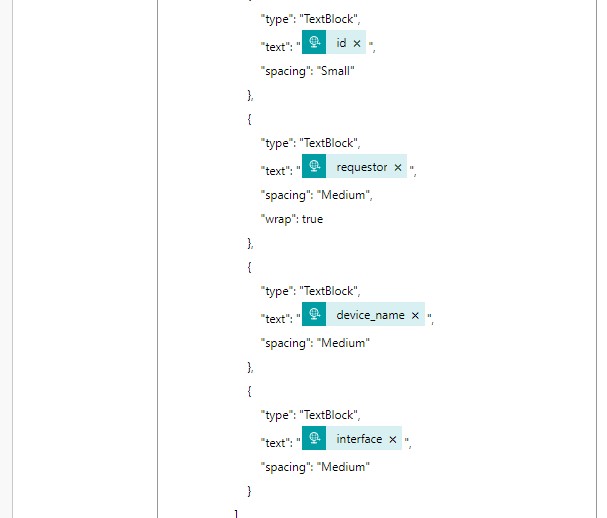
Okay, almost done. The final thing we need to do is send the notification. In this case I will send it via a Teams Instant Message, but you could also post it to a Teams Channel. Copy the JSON document describing your Adaptive Card from the designer app into the flow Message field. Replace the example values with the variables. Click on ‘Advanced’ at the bottom of the stop to populate the message title and enable desktop alerts if you wish to do some. Save the flow.
| Add Action to Post Adaptive Card to User | Insert variables where required |
|---|---|
 |
 |
Finale
Now we are ready to test! From your automation process send the JSON document to the webhook URL provided in step 1 of the Power Automate flow. In the example below I am triggering the flow from Python:
import requests
import json

automation_result = {
    "id": "2425",
    "requestor": "user@company.com",
    "result": "Succeeded",
    "data": {
        "device_name": "router-xyz",
        "interface": "GigabitEthernet1/0/33",
        "vlan": "printers"
    }
}
url = "https://prod-123.westeurope.logic.azure.com:443/workflows/235cb58..."
requests.post(url=url, data=json.dumps(automation_result))
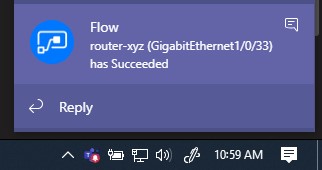
If successful, you should see a desktop alert from Microsoft Teams, and a message from Power Automate.
| Microsoft Teams Notification | Microsoft Teams Message |
|---|---|
 |
 |